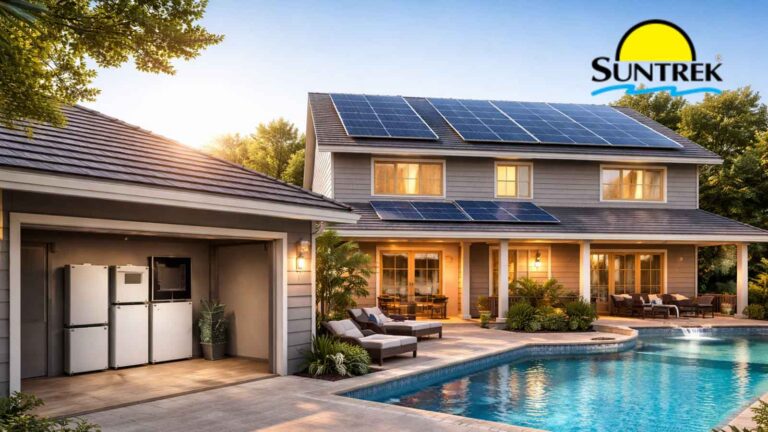
The most common service call Suntrek Solar receives starts the same way: “My solar pool heating system isn’t heating the way I expected.” Before dispatching a technician, there are a handful of checks any homeowner can run, and one tiny switch that turns out to be the culprit more often than any other component on the system. This walkthrough is straight from a Suntrek Solar service technician, captured on video and broken down step by step below.
This walkthrough captures something every solar pool heating owner in Southern California, Northern California, and Las Vegas should keep in mind: most “my system isn’t heating” calls are not a system failure. They’re a settings issue, a scheduling issue, or a single toggle switch flipped the wrong way.
If you’ve worked through the full checklist and the system still isn’t performing, that’s when it’s time to schedule a service visit with a Suntrek Solar technician for an on-site assessment of the controller, sensor, valve actuator, and collectors.
[0:00]
So, we’re going to talk about probably our most common service inquiry that we have at Suntrek. And the symptom that a customer is calling us with is our solar pool heating system isn’t working. It’s not heating. It’s not doing what I thought it would do.
[0:20]
When we get these sort of inquiries, there’s a couple quick questions we want to ask ourselves to make sure that we’re aligned with our customer, their needs, and expectations. The first is: do weather conditions permit it to be effective at heating the pool? In other words, if it’s December or January and the weather’s not great, the system’s not going to be effective.
[0:44]
But let’s say it’s May, June, July, August, September. We’ve got beautiful sunny days and the pool is not reaching reasonable target temperatures, temperatures in the 80s during those good months out of the year. There’s a couple things that even a homeowner can do on their own without the need of a service technician to troubleshoot independently. These are also the steps our service technicians would take when they come to the property to assess the issue.
[1:16]
The first checklist item is making sure that the pool pump run time is sufficient and conducive for solar heating performance. What does that mean? It means your pool filter pump is scheduled to run 6 to 8 hours a day when the sun is out.
[1:36]
While every installation can be different, by and large most solar pool heating systems will get the best production from 9:00 a.m. to 4:00 p.m. That’s going to be the sunniest time of the day. Because your solar pool heating system runs off of and depends on your pool filter pump to operate, we want to make sure it has the ability to operate, and the pump needs to be on to do that.
[2:02]
If you have a time clock that schedules your pump to turn on and turn off, we want to check that time clock and make sure it’s running during the sun hours of the day, 9:00 a.m. to 4:00 p.m.
[2:12]
The next checklist item is checking the controller and making sure the settings make sense. We’re going to look at this controller right now, at a couple of things. The first thing is the target temperature. My target temperature is set for 85 degrees. Right now it says the pool temperature is 65 degrees, quite a ways off of where we want to be.
[2:44]
Right now we’re sitting in a warehouse. It’s not sunny inside this warehouse, but I’ve poured a cup of hot water inside the pipe where our solar sensor is sitting, and it is nice and toasty, simulating a sunny day. When we look at the controller, it says the solar heat is on, and it says it’s looking to maintain a temperature of 85 degrees. But as we just pointed to, the current temperature is 65. So something’s off.
[3:14]
Let’s pretend we’ve had lots of sunny days leading up to this, and the system is not reaching desired temperature or performing the way the homeowner, or even we, would expect it to. So we’ve checked the time clock settings. The pump is running during the times of day it should. The controller shows that the solar is on and working to maintain the desired temperature.
[3:41]
The next step is going to the pool equipment. I can tell by looking at the pool where the solar valve is, but not everybody can. Oftentimes the pool equipment is a mess of pipes and valves that scares most people away. One way we can easily identify which valve is the solar valve is by manipulating the controller and then looking at the equipment to see which valve moves.
[4:10]
I’m going to lower my target temperature below the pool water temperature. The solar is going to turn off now because it thinks it’s already reached desired temperature. I’m standing next to our solar valve, I can see that it’s moving. We’ve identified it. Now, I’m going to turn the solar back on by raising the pool temperature back to the 85 degrees I want it to be.
[4:47]
What we want to do next is make sure our solar valve is actually in the right position. That might sound funny, but a very common occurrence is when your pool service provider goes to maintain and clean your pool and filter, oftentimes they’ll turn the solar system off. They do that sometimes to get more suction as they’re vacuuming the pool, or when they’re backwashing the filter, they’re supposed to turn the solar system off, but sometimes they forget to turn it back on.
[5:28]
When we’re trying to figure out if the valve is in the right position, we’re going to be looking at not only our solar valve but our filter pressure gauge. When a solar system turns on, the filter pressure should rise 7 PSI on average. Every pool’s different, let’s say 5 to 10 PSI is a range, but there’s no doubt that when the solar turns on, the pressure should go up. It should not go down.
[5:52]
Right now, our control system says it’s on. We have every reason to believe the solar system is on, but it’s not heating the pool. I know the answer to the problem, but we’re going to figure it out together. I’m going to repeat what I just did, lower the pool temperature and simulate the solar system turning off, and watch the filter pressure gauge. As I lower the pool temperature and the solar system turns off, the filter pressure should go down.
[6:32]
Right now the filter pressure is at about 5 PSI. I’m going to turn the solar system off, and we should see the PSI decrease if things are working properly. I’m going to go ahead and turn this down below the current temperature. The solar system’s turning off, and we’re going to watch the pressure gauge. Does it drop the way we expect it to, or does something else happen?
[7:09]
We’re seeing the pressure go up.
[7:12]
What does this mean? When the solar system turns off and things are operating properly, the pressure should drop off. So why is it going up? It’s because our solar valve is in the wrong position. Why is it in the wrong position? Because the actuator, the motor that controls this valve, has a switch on it that has been flipped in the opposite position it should be in.
[7:39]
What’s happening is the control system is telling you it’s on, but it’s really the opposite. It’s off. And if this turns off, it’s turning on. It’s backwards. The way we fix that is by flipping the actuator toggle switch. We’re going to look back down at the solar valve actuator. Underneath, on the bottom side, is a little switch. I’m going to flip it into the right position. As we do that, you’re going to see the valve start to move.
[8:10]
That toggle switch is the culprit behind a lot of service requests we get. We’ve talked about it in the sense of the system not heating the pool because it’s off instead of on. The controller thinks it’s on, but it’s really not. In reality, there’s a disconnect between the motor that turns the valve and the brain, the controller, as they’re doing opposite things.
[8:34]
There’s a couple other symptoms someone could experience with this being in the wrong position. The first is what we just talked about: the system isn’t heating effectively. The second is the pool’s getting too hot. Why would that happen? Because the controller is going to say, “We’ve turned off. We’ve reached desired temperature.” But because the actuator is in the wrong position, it’s going to keep the solar on and keep heating the pool even though we’ve told it to turn off.
[9:12]
If you’ve got a pool that’s 95 degrees in the middle of summertime, or 100 degrees, this could be the culprit. If everything is working properly, once the pool reaches desired temperature, the solar is going to turn off so it doesn’t heat it anymore.
[9:26]
The third issue with this same problem is you try heating your spa at nighttime and it takes forever to heat. Why? Because at nighttime the solar system should be off, there’s no sun. But because things are backwards, the solar system is on at nighttime. It’s circulating water through your solar system at night. As your gas heater tries to heat your spa, it’s sending water to the roof first. You’re heating your neighborhood’s atmosphere instead of heating the spa.
[10:08]
All three of those things boil down to the solar valve actuator toggle switch, the arch nemesis behind most of the service inquiries we get. The fix is going back to your valve and flipping a switch. As simple as that. But context is everything.